Scratch Holograms on an HP Plotter
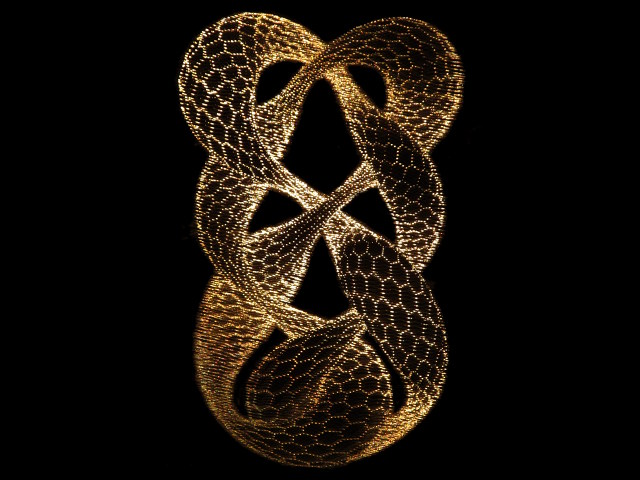
I’ve been interested in abrasion or scratch holography for a few years, and have used it in a few art and engineering projects. I’ve written about it before here and here. The basic concept is that a hologram of 3-dimensional points of light is created from the reflections of a single light source on curved scratches in a flat material. The effects can be both beautiful and mathematically interesting, and the level of detail that can be created is impressive:
Creating these holograms by hand, however, is pretty tedious, since each point of light requires a separate arc with a precise position and radius. Naturally, I’d like to automate the actual creation of the scratches so that I don’t have to make them by hand. I’ve had some success with doing this on a CNC milling machine using a vinyl cutting bit, as I mentioned in a previous post. I’d prefer, though, to be able to do this in my own home, so I’ve been searching for a smaller, cheaper, and lighter tool to do the same job.
Enter the Plotter
My friend phleb managed to get his hands on an HP7475A pen plotter, a 2D drawing machine which predates most modern printers. The plotter has a pen holder which moves vertically, a stepper motor to move the pen left and right across the page, and a stepper motor to move the paper forward and backward. Naturally, my first thought on seeing this device was that it could be the perfect machine for making scratch holograms.
Mounting the tools
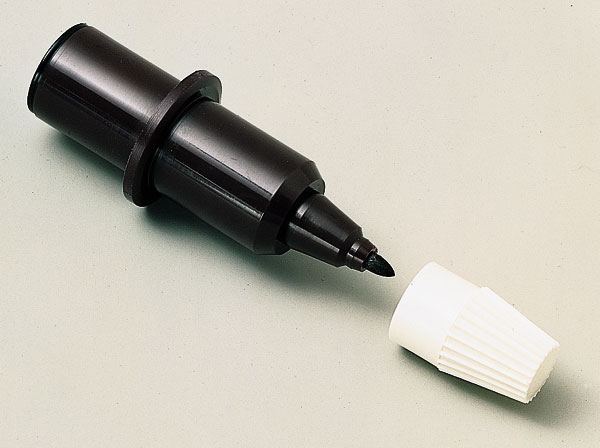
The HP7475A is designed to use special pens which look something like this:
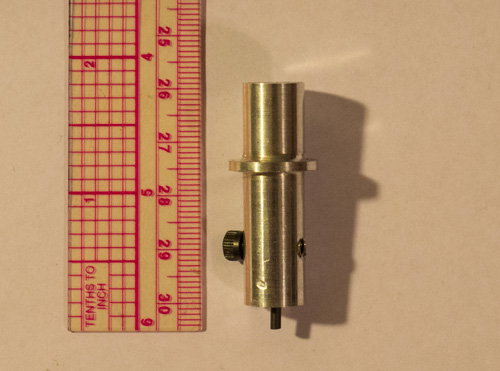
Originally, I decided to manufacture a piece to hold a scratch cutting tool in place of the pen, based on this 3D model of an HP pen. What I came up with was this:

I can mount a nail or compass point for etching, or a piece of pencil lead for drawing, and the set screw in the side holds the tool in place:
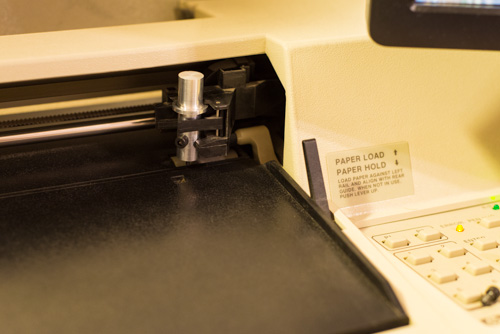
The holder mounts into the plotter just like a pen would:
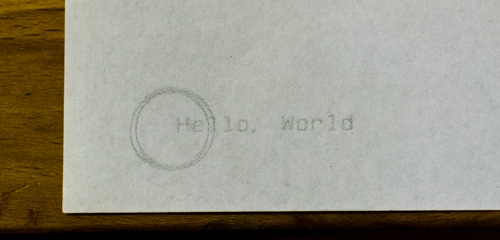
Using the wonderfully-named chiplotle library, I was able to command the plotter to draw basic geometric shapes and text in Python. Here’s the result:
This was tremendously promising! Unfortunately, using this setup to create scratch holograms didn’t work at all. Scratch holograms require extremely clean, smooth scratches, as explained by Willeam Beaty in his original post about scratch holograms. The perfectly vertical orientation of the cutting tool in my holder, however, caused the tool to skip and jump as it moved across the plastic, resulting in jagged and unusable scratches. Instead, I needed a cutting tool that would smoothly drag across the surface without skipping.
Vinyl cutters
Another use for devices like my HP plotter is in cutting vinyl for signs or other artistic projects. Doing this requires a special vinyl cutting tool, which consists of a tiny, extremely sharp blade mounted on a pivot. The tip of the blade is a millimeter or two off the axis of the pivot, so the tip is always dragged behind when the cutter is moved, resulting in a very clean cut in any direction. These cutters also come in cases designed to fit into plotters like mine, which look like this:
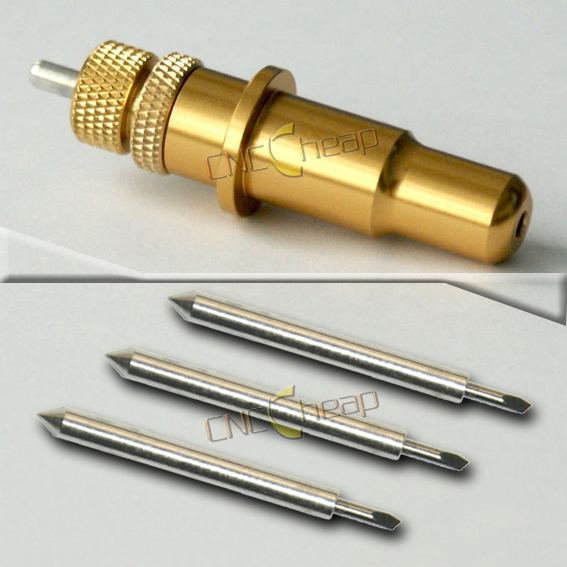
The vinyl cutter seemed to perfectly solve the problem of the tool skipping as it moved.
Results
So, did it work? Er…no. Not at all. I’ll demonstrate what happened, and then try to explain why. Here’s an image of the results:
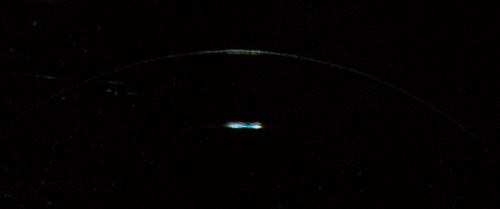
You can see two illuminated scratches in the above photo. The lower scratch, created by hand, shows a relatively small, brilliant spot of reflected light. The upper scratch, created on the plotter, shows a dull smear of light. Scratch holograms require that each scratch arc produce a single, concentrated reflection of light, so the upper arc will produce a very poor holographic image. All of my attempts with the plotter resulted in similar, dull scratches which failed to produce clear holograms.
Understanding the results
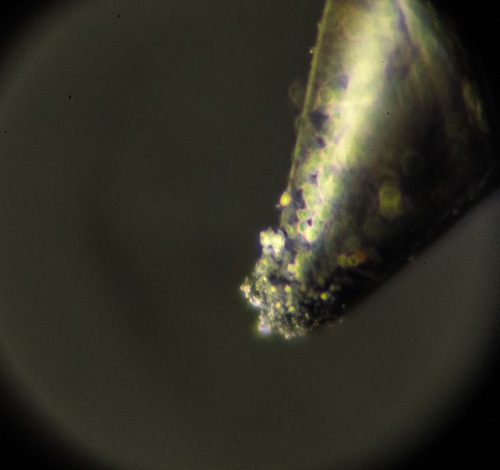
Why does the plotter produce such bad scratches? To figure this out, I needed to wait until I had the mechanism to examine the microscopic structure of the scratches themselves. My recent experiments building a microscope provided exactly the tool I needed. First, let’s look at the tools I’m using. For my holograms, I’m primarily using a compass point to etch the arcs. My compass point looks like this under a microscope:
I’ve also had success using a different, duller compass point, shown here:
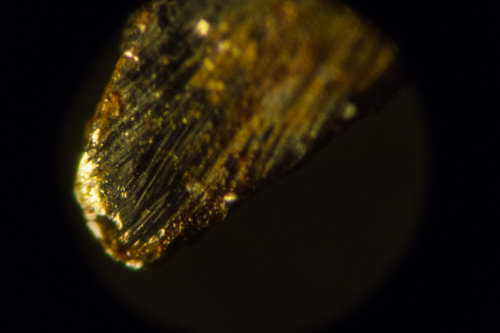
Finally, here’s the vinyl cutter’s tip, which is much sharper than either of the compass points:

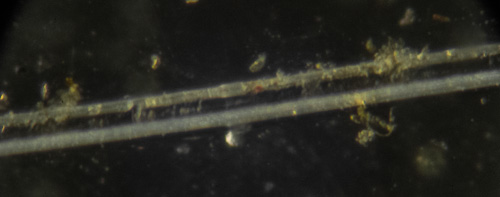
Here’s a magnified image of a scratch created by hand using the first compass point:
And here’s a scratch in the same material using the vinyl cutter, still controlled by hand:
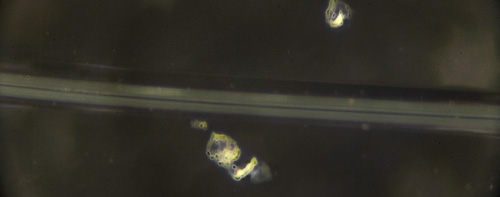
The dark line through the center of the scratch is, I believe, the flat surface at the bottom of the scratch. It’s much narrower than in the previous photo since the vinyl cutter has a much sharper point. Both of these scratches produce acceptable holographic reflections in my experiments.
Now, however, let’s look at the result from the HP plotter using the vinyl cutter:
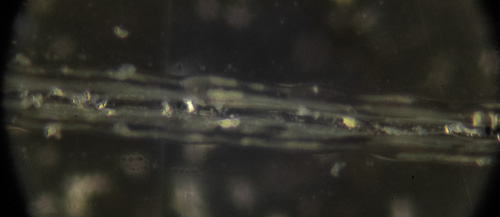
This scratch is a mess, and now we can begin to understand why the reflection produced is so poor. The twisted, rough edges provide many locations for weak reflections of light, so we get a smeared-out, dull reflection of our illumination. None of these problems were present with the hand-held vinyl cutter, so the problem must stem from imprecision in the movements of the plotter.
Conclusions
I think that this is probably the end for my HP plotter as a scratch hologram device. Without serious hardware modifications, it doesn’t seem to be precise enough to create the clean arcs that I need. I’m sure I’ll find some other use for it down the road, but for now it’ll have to be restricted to more two-dimensional art forms.
Robin Deits 14 October 2013