More Scratch Holograms
This is a continuation of the work I started in my earlier post on Scratch Holograms, generating “scratch holograms” by etching arcs into pieces of plastic, as shown in William Beaty’s video here:
I can now render holograms of “solid” object models, with transparency and opacity, and I can even reproduce those holograms using computer-controlled machine tools, rather than making them by hand. You can play with the code at rdeits/ScratchHolograms
Rendering Opacity
My previous work on holograms required every point in the object to be visible from every viewing angle, like a wire-frame image:

For the cube I used in my previous post, I faked this, by just deleting from the SketchUp model the points and edges which weren’t supposed to be visible.
For the next software version, however, I wanted to do something better. I wanted my models to be solid, with some lines and points hidden by other parts of the model (like the back side of the cube being hidden by the front). The basic idea of scratch holograms with opacity is to remove sections of the arc scratches corresponding to the angles from which a given point is hidden by something else. Here’s a simple demo consisting of a single point, hidden behind a wall:
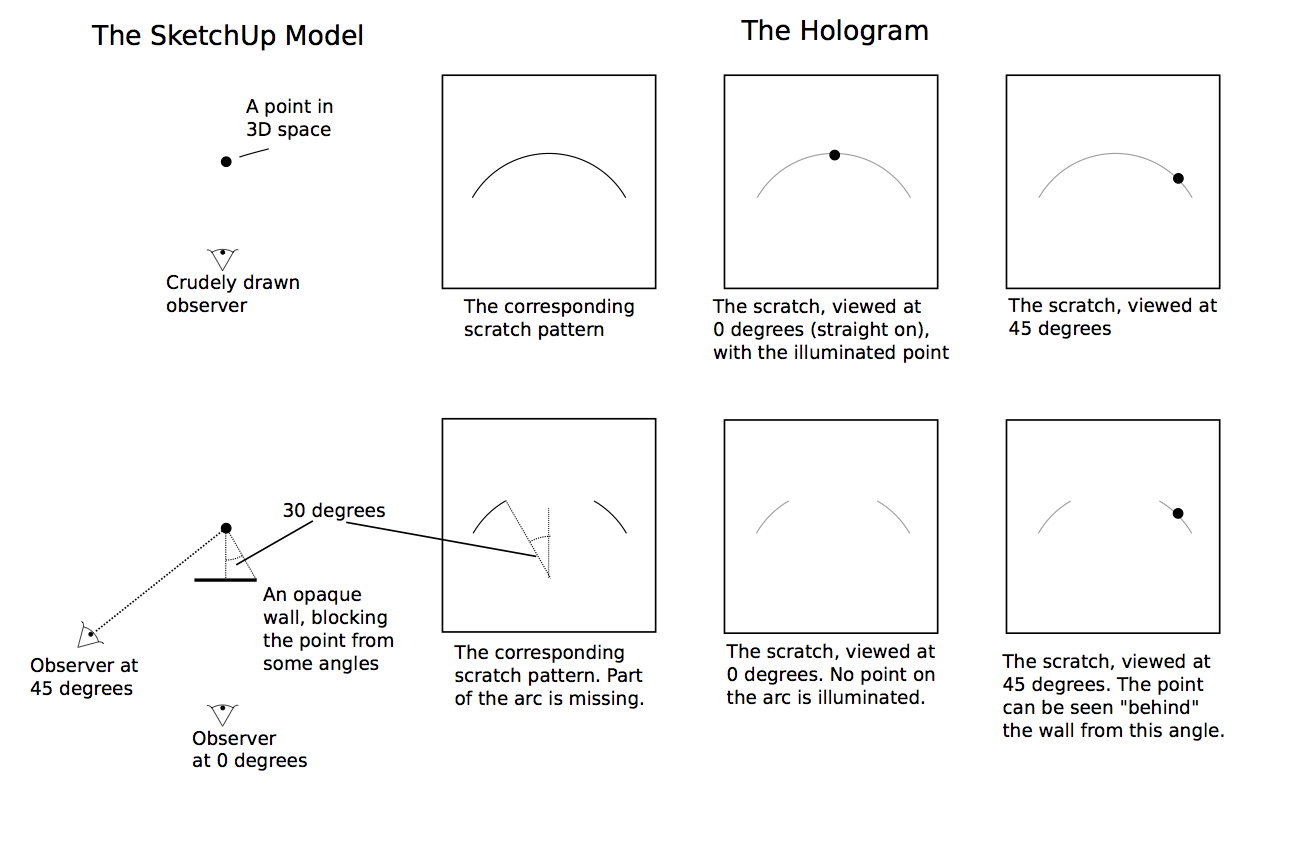 (click to enlarge)
Detecting Opacity in SketchUp
As it turns out, the SketchUp API has a useful tool called “raytest” which will try to draw a line from a given point in a given direction, and will return any objects in the model that that line happens to run into. So, given a SketchUp model that we would like to render as an opaque hologram, I just rotate a virtual observer around each point in the model, doing a raytest from the point to the observer at every 1 degree step of rotation. I can then use that data to build up the (incomplete) scratch arcs for the solid model hologram. You can see a bunch of samples of this technique here.
Making Holograms with Machines
There’s a certain soothing zen to sitting around etching circles into plastic, but my patience and my fine-motor skills were rapidly surpassed by the complexity of some of the hologram patterns I was able to produce. To make really interesting shapes, I needed a way to produce holograms faster and more accurately than I could by hand.
I had never used a CNC (Computer Numerical Control) milling machine before, but it seemed like an obvious choice for the task, given its almost perfect mechanical accuracy and easy programming. I happen to have free access to such a machine, courtesy of the absolutely fantastic people at the MIT Edgerton Center Student Shop. Controlling the machine was as simple as printing my hologram scratch pattern as a DXF file, using MasterCam Mill to automatically convert that to a toolpath, and then loading it into the machine and running the program.
Well, actually, it wasn’t quite that easy…
The biggest problem I encountered was in choosing the correct tool for machine-etching the holograms. For my first attempt, I used the same point which was in my compass, mounted in the jaws of the machine. This occasionally worked, but there was less than 0.001 inch of tolerance between being too shallow (so that the scratches were barely visible) and being too deep (which gouged the plastic and caused rough, unusable scratches). Although the machine could certainly work within that tolerance, the plastic itself wasn’t perfectly flat, and I simply could not get repeatable results.
I managed to get high-quality scratches using two different tools. The first was a center drill, which has a nice sharp point which seemed to create much smoother scratches than my compass tip. The second was a vinyl cutting bit, an extremely sharp knife tip which is free to rotate on a pivot. Both of these worked, but neither was perfect. The center drill tended to produce scratches which were too wide and tended to blend into their neighbors, while the vinyl cutter’s rotating knife tended to wander and leave plastic chips, especially when changing direction.
Results
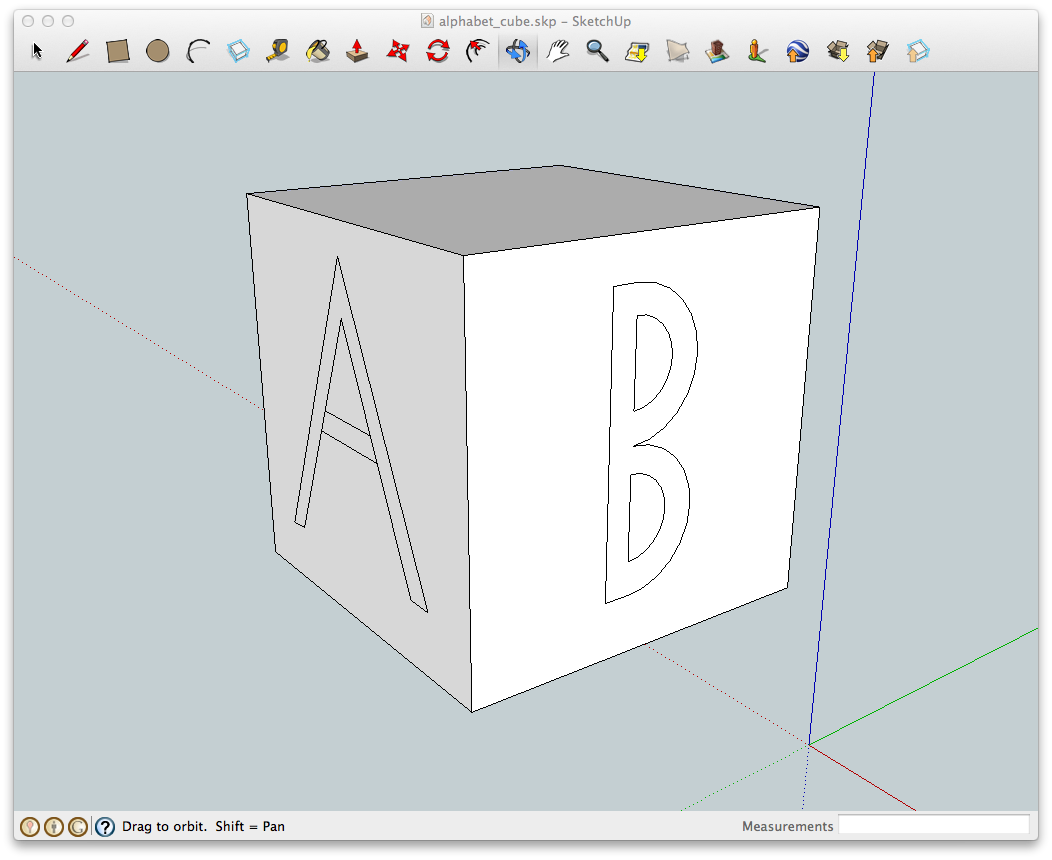
To test this technique, I drew a cube with a letter B on the front face, a letter A on the left face, and a C on the right face. You can download the SketchUp model from github.
Here’s one view of the sketchup model, showing two of the faces:
And here are simulated views of the model at three different angles: -25 degrees, 0 degrees, and +25 degrees.
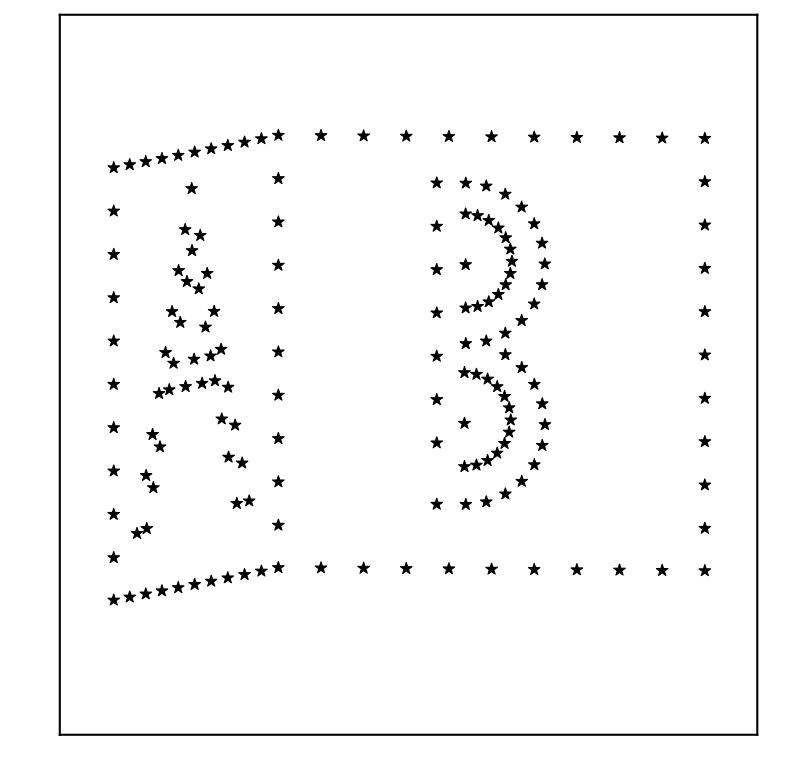
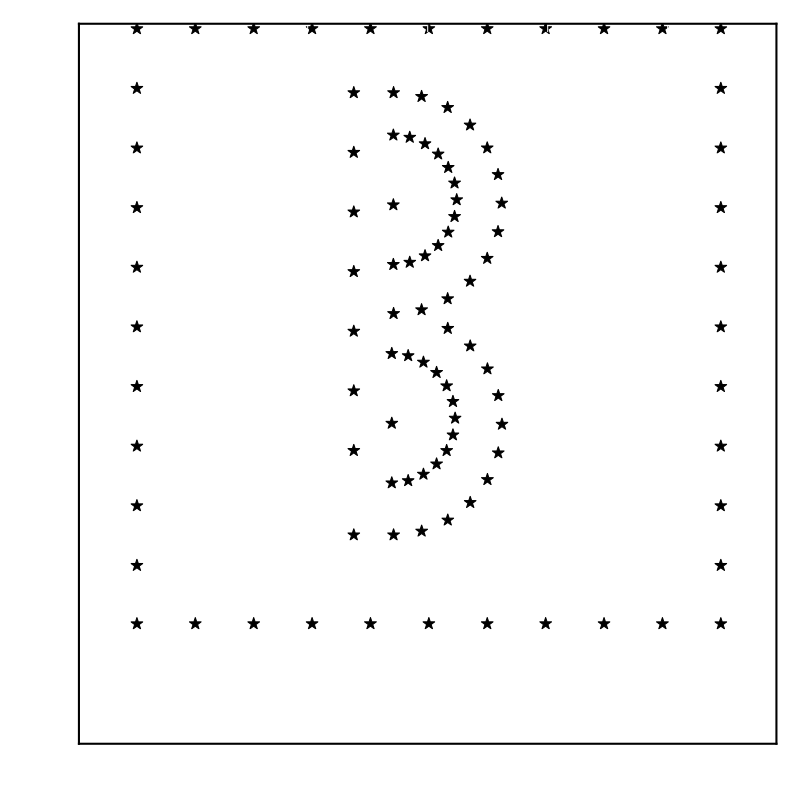
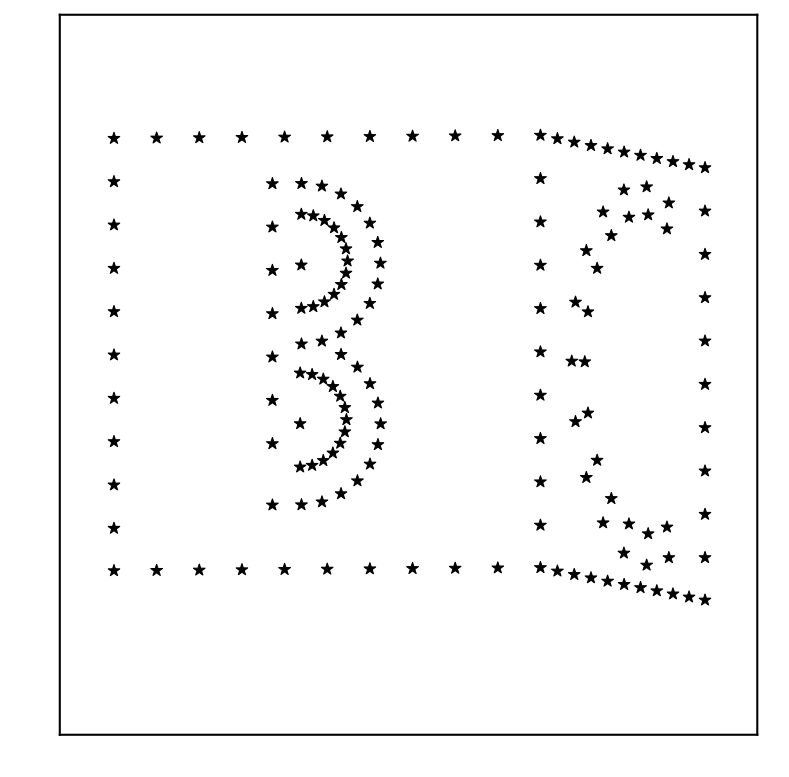
Note that the “A” and “C” are hidden by the body of the cube when viewed from the other side.
Using a center drill bit on a Lexan sheet, I was able to produce a physical hologram from this same model, complete with simulated opacity:
Conclusions
I’m definitely not finished with this project, but I’ve also made a lot of progress. Object modeling and conversion from SketchUp seems to be working well, but I haven’t perfected the final step, transforming the scratch patterns into a physical object reliably. Feel free to play around with the code at https://github.com/rdeits/ScratchHolograms, and let me know what you think.
Robin Deits 20 February 2012